How to Redirect Users in WordPress

Redirections are a standard part of websites, plugins, and themes. Some are happening right in front of eyes, and you might not be even aware what’s going on in the back.
Although redirections are usually left for developers, we are going to show you several tips that will let you do that task on your own.
How to redirect specific user roles after successful login
In this part of the article, we will show you a code that you can easily modify and control where a certain user lands after successful login to your WordPress powered website.
By default, WordPress will take every user to the dashboard and that might be a problem for some of you. Maybe you want to keep your admins and authors on the backend while you want to lead your other users directly to your homepage or maybe onto another frontend page you have created specifically for them.
To redirect users based on their roles, follow next steps:
- Open functions.php file
- Copy and paste the following code:
function my_login_redirect( $url, $request,
$user ){ if( $user && is_object( $user ) &&
is_a( $user, 'WP_User' ) ) {
if( $user->has_cap( 'administrator') or
$user->has_cap( 'author')) {
$url = admin_url();
} else {
$url = home_url('/custom-page /');
}
}
return $url;
}
add_filter('login_redirect',
'my_login_redirect', 10, 3 );
- Save changes
The code shown above will leave the admins right where they need to be – the admin panel, while all other users will be taken to a custom page.
You can easily change URLs by changing the $url variable on the 4th and the 6th line and therefore lead your users to any posts/pages you have created for them.
If you want to control user roles, you can do that easily on the third line of the code. In the above-given example, we have left admins and authors on the admin panel. If you want only admins there, simply remove the authors from the picture:
if( $user->has_cap( 'administrator' ) ) {
Instead of removing authors, you can add other roles as well; it is up to you to decide who will end up on which page.
That’s it. With this code, you don’t need any plugin to control the redirects after a user logs in. If you’re still not into changing the code, see how to redirect users after login with a plugin.
Redirect users after login with Peter’s Login Redirect plugin
While you can quickly redirect users after login by placing some code we showed you earlier, this isn’t the best option for those who aren’t into coding. Also, if you want to get more control over redirections, you will have to know how to modify the code.
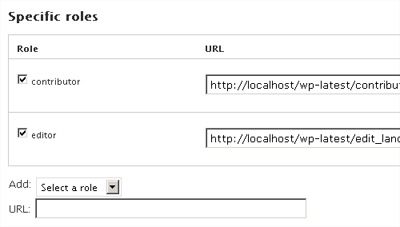
Instead of modifying the code, we will show you a plugin which will do the dirty work for you. All you have to do is decide which user goes where, click on few checkboxes, and paste URLs while the plugin will take care of the rest.

Although there are numberless WordPress plugins designed to do the same, we have chosen Peter’s Login Redirect for this part of the article.
This plugin will let you choose users based on their names, user roles, and even user capabilities and simply paste URL to which that users will be redirected after they log in. It’s possible to even choose another page if you want to redirect that user or group of users after they log out. In addition, you can choose a separate URL which will be used as a destination page for any user upon their registration.
If that’s not enough for you, and you want to further improve your redirections, Peter’s Login Redirect got you covered. If you have, for example, created a specific page for each user, you can generate the URL directly from the plugin. In that case, a simple shortcode described in the plugin will be enough to input user’s username and thus lead that particular user to his/her specific page.
In the end, there are few plugin options to be found which can help you further control the plugin’s behavior. You can set the plugin to use only one type of URLs and, for example, allow only internal links to be used, control POST and GET redirects, use an external redirect file if needed, and choose who can control this plugin by choosing permission levels.
If you needed to manage login, logout and registration redirects, Peter’s Login Redirect will get you practically everything you need. Oh, yeah, have we mentioned that the plugin is free? You can get it from the WordPress plugin repository and install it in seconds after which all you have to do is navigate to Settings -> Login/Logout Redirects.
How to redirect a WordPress user after logout
By default, when a user logs out from a WordPress website, he or she will be taken back to the login page. A message will be shown that notifies a user about successful logout and the rest of navigation is left to users.
But what if you want your users to be automatically redirected to your homepage, discussion pages that you want them to see or any other pages of interest? Maybe you want to create a different logout page which will contain special widgets or lead your users somewhere else? If so, you will need this little code to make everything happen.
In the next few lines, we’re about to show you how to easily redirect a user to any URL you want. If you don’t want to use the code for redirections, we’re about to show you a simple plugin which will do all that for you. But before that, let’s redirect a user to the homepage:
- Open functions.php file
- Copy and paste the following code:
add_action('wp_logout','auto_redirect_after_logout');
function auto_redirect_after_logout(){
wp_redirect( home_url() );
exit();
}
- Save changes
- Logout and enjoy your beautiful homepage
It is simple as that. As you can guess from the code, you can redirect a user to any other URL by changing the third line. So, if you want to lead your users to another page of your own site or to any external page, your code should look something like this:
add_action('wp_logout','auto_redirect_after_logout');
function auto_redirect_after_logout(){
wp_redirect( 'https://firstsiteguide.com');
exit();
}
If you want to do more with wp_redirect function, you can learn more about it on WordPress Codex pages.
Login and Logout Redirect
PRICE: Free

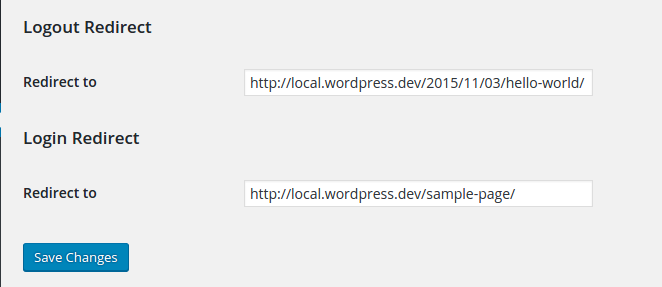
This free plugin is relatively simple and will do its job perfectly. Instead of dealing with the code, Login and Logout Redirect will create an additional segment on the settings page. After you install and activate it, you have to navigate to Settings -> General and scroll all the way to the end of the page. Here you will find separate input boxes for Login and Logout redirects. Enter desired URLs, save changes and you’re done!
Redirect users after leaving a comment
When you start publishing articles, you will want people to comment on them, of course. In this part of the guide, we’re about to show you how to redirect a user after submitting a comment.
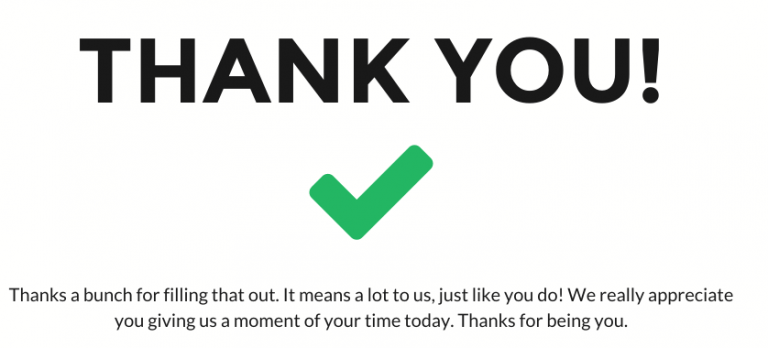
This function might come in handy for you in specific situations. For example, you might want to create a custom “thank you” page for a giveaway you’re organizing. So, when visitors participate in a giveaway by leaving a comment, you can easily redirect them to that “thank you” page where you can provide additional information about prizes.
There are actually tons of different reasons you might have for redirecting a user after leaving a comment, so without further ado, here’s what you need to do in order to automatize the process.
Redirect user after submitting a comment:
- Open functions.php file
- Copy and paste this code into the file:
function redirect_after_comment(){
wp_redirect('/thank-you/');
exit();
}
add_filter('comment_post_redirect',
'redirect_after_comment');
- Change the name of the page on the 2nd line
- Save changes
That’s it. You can now go on and test the function. Open any of your posts and leave a comment. If you have done everything correctly, you should end up on http:/www.yoursite.com/thank-you page or the one specified on the second line of your code.

Don’t forget to thank people for commenting but also don’t forget that you want your visitors to stay on the site and continue on browsing. A good idea might be to add a list of your recent or most popular posts, or maybe even better to list all related posts which might be of interest to a commenter. If you have a mailing list, this is a good place to offer a subscription to it.
While this function offers an easy and quick way of redirecting users after they leave a comment, you may be interested in a plugin that will give you some additional features.
Redirect users after search if there was only one result found
Search functionality is a must have if you’re dealing with a larger number of articles. If you are writing on a daily basis, imagine the number of articles scattered across different categories. If you publish only three short articles per day, there will be over a thousand different titles in your database after the first year. Now imagine yourself coming to the site for the first time while looking for something specific – you will want to search for it.
By default, WordPress will search through post titles, tags and of course the content. So, if searching for a word or a specific phrase, it will probably found dozens of posts and pages which contain the query. But what if there was only one search result?
If someone was searching for a very specific phrase or an entire sentence, chances are there will be only a few or maybe only one result. If there is only one result found, redirecting a user to the search results page is quite unnecessary. Instead, why wouldn’t you take that user directly to the post/page found in the result?
Let’s see how to do that:
- Open functions.php
- Copy this code and paste it at the end of the file:
add_action('template_redirect',
'redirect_search_result);
function redirect_search_result() {
if (is_search()) {
global $wp_query;
if ($wp_query->post_count == 1 &&
$wp_query->max_num_pages == 1) {
wp_redirect( get_permalink(
$wp_query->posts['0']->ID ) );
exit;
}
}
}
- Save changes
You have prepared your WordPress for the new functionality. After you have saved changes, every time a user searches for something which will return only one results, that user will be redirected directly to the post/page.
Even if it seems like nothing much, we’re sure your visitors will like you for saving them a click of a button. Saving a click here and a click there will result in a better user experience and that’s probably something you want on your website, isn’t it?
Redirect users when there’s only one post in a category found
Instead of opening a category or tag page which contains only one result, you could redirect that user directly to the post/page. As with the most of our code snippets, it will be enough just to copy and paste the code:
Redirect a user if there was only one post in a category or a tag:
- Open functions.php file
- Copy and paste the following code:
function redirect_to_post(){
global $wp_query;
if( is_archive() && $wp_query->post_count == 1 ){
the_post();
$post_url = get_permalink();
wp_redirect( $post_url );
}
} add_action('template_redirect', 'redirect_to_post');
- Save changes
After you’re done with the code and you have saved the changes, you can test the feature by opening a category or tag page which contains only one post/page in it. Instead of opening a page where only that one post/page is shown, you will be redirected directly to the post. Awesome, isn’t it?
Since some users might get confused by this, it would be a nice idea to include a custom message which will tell users that there was only one result found and that the redirection occurred. If you want to do that, you can leave the message on top of the post/page a user was redirected to by inserting a simple “echo” statement. In that case, your code would look like this:
function redirect_to_post(){
global $wp_query;
if( is_archive() && $wp_query->post_count == 1 ){
the_post();
$post_url = get_permalink();
wp_redirect( $post_url );
}
echo "Since there was only one result found,
you have been redirected to this post/page!";
}
add_action('template_redirect', 'redirect_to_post');
Now that even a message has been implemented, you’re done and you won’t have to take care of those categories and tags which contain only one post/page. But don’t let this feature be an excuse for not writing new articles in the category.
Redirect users to a random page in WordPress
This might not be a standard feature of every WordPress website, but sure can be a fun tool to have somewhere on your site. If you write a lot or maybe have numerous galleries, you can end up having thousands of pages which an average user won’t get to see. So why wouldn’t you make things a bit more interesting with redirecting a user to a random post?
OK, you won’t be redirecting a user to a random post without their knowledge or do that on the homepage, of course. But you can create a simple button or link which a user can click after which he will be taken to another page of your site. Maybe it’s a gallery. Maybe a cool editorial you had written years ago. Who knows. It can be fun.
Let’s get started:
- First you need to prepare your redirect link. Open your functions.php file
- Copy and paste the following code:
add_action('init','random_add_rewrite');
function random_add_rewrite() {
global $wp;
$wp->add_query_var('random');
add_rewrite_rule('random/?
- Save changes
- Go to www.yourdomain.com/?random=1
, ‘index.php?random=1’, ‘top’); } add_action(‘template_redirect’,’random_template’); function random_template() { if (get_query_var(‘random’) == 1) { $posts = get_posts(‘post_type=post&orderby=rand&numberposts=1’); foreach($posts as $post) { $link = get_permalink($post); } wp_redirect($link,307); exit; } }
After this, you are ready to create your link/button. All you have to do is link to http://www.yourdomain.com/?random=1 and every time a user opens the page, he will be redirected to a random page. Enjoy your new feature.
Redirecting you to the conclusion
Sooner or later, you will want to redirect specific users in specific situations. Whether there’s a good reason for that and you’re trying to make your visitors buy something or you just wanted to make the login process more comfortable, this tutorial will help you manage redirections.
If you are comfortable enough with coding, you will be able to improve on this and redirect users in different situations as well. If not, we hope these examples were just enough to cover your needs.

Successfully redirected users to a specific page using the manual method and worked perfectly fine, thank you Sir. God bless you in Christ Jesus!
Thanks for your article. I think I’ll install the Peter’s Login Redirect plugin to redirect users after login. I’m not really familiar with coding so other methods are quite complicated to me.
Thanks for sharing your information & keep it up. It’s very helpful to me.